Alla rapporter i Genney använder sig av en utskriftsmall. Utskriftsmallen bestämmer vilka data som ska tas med i utskriften och hur den ser.
Utskriftsmallarna ändrar du från huvudmenyn > Utskriftsinställningar eller från den aktuella rapporten där man också väljer man vilken mall som ska användas av rapporten.

Allmänt
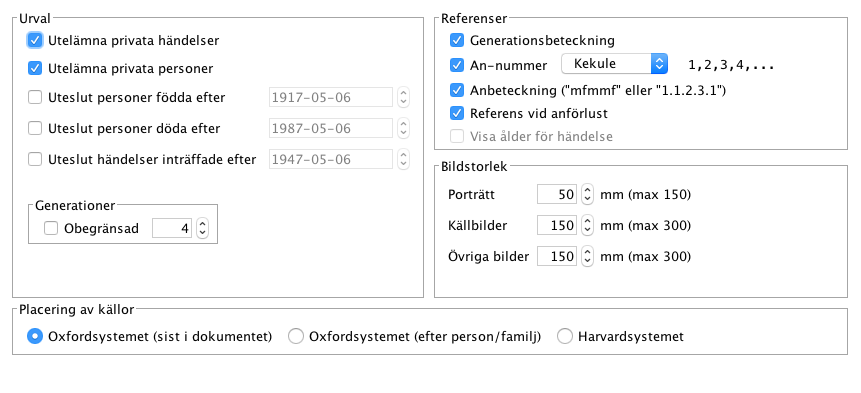
På första fliken i utskriftsinställningar kan man begränsa sitt urval baserat på antal generationer, närhet i tiden eller om privat data ska ingå.
Under referenser har man möjlighet att välja vilka referenstyper som ska användas. Vilka referenstyper som går att ändra beror på rapport-typen.
Bildstorlek anger utskriftsstorlek för olika bildtyper men berör endast den bilder där man inte angett ett eget värde för en specifik bild.
På samma flik kan man också välja placering av källor. Oxford-metoden (en siffra till hänvisningen i slutet av sektionen eller dokumentet) eller Harvard-metoden (en sammanfattning av källhänvisningen direkt efter personen, familjen eller faktauppgiften).
Uppgifter
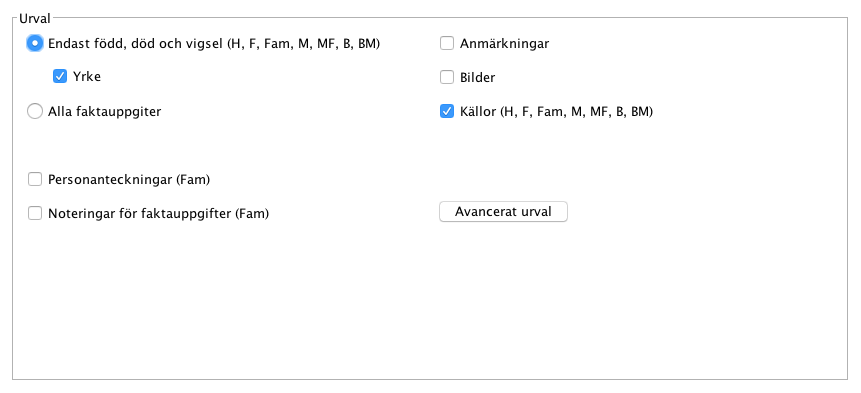
Här väljer man vilka uppgifter som ska tas med i rapporten. Under urval visas snabbvals-alternativ där bokstavskombinationerna inom parenteserna anger vilka roller det berör.
Det finns sju olika roller:
- H = huvudperson
- F = föräldrar
- Fam = familjer
- M = make/maka
- MF = make/makas föräldrar
- B = barn
- BM = barnens make/maka
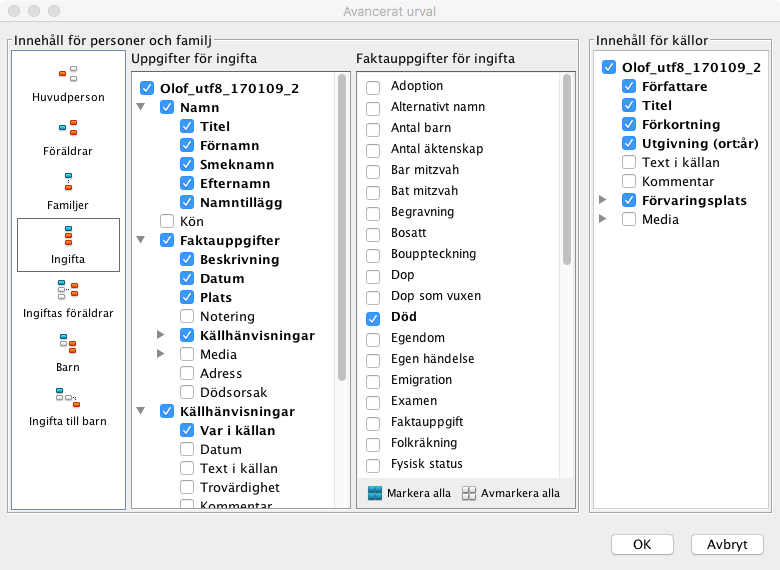
Under Avancerat urval kan man finjustera vilka uppgifter som ska ingå för källor och för de sju olika rollerna.
I bildexemplet finns under uppgifter för ingifta en hierarkisk struktur för rollen där man kan tända de uppgifter man vill ska ingå. Notera att det är skillnad för t.ex. källhänvisningar som ligger direkt under roten och källhänvisningar som ligger under faktauppgifter. Media finns på fyra ställen; för rollen, för källhänvisningar för rollen, för faktauppgifter och för källhänvisningar till faktauppgifter.
Faktauppgifter för ingifta visar vilka typer av faktauppgifter som ingår i rollen ingifta och innehåll för källor, som inte är kopplat till någon roll, vilka källuppgifter som ska visas i rapporten.
Text
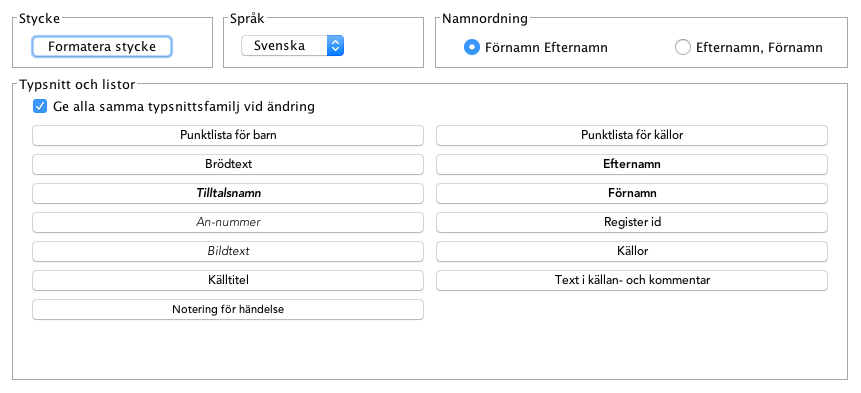
Under tredje fliken ändrar man stil för utskriften.
Stycke ändrar radavstånd, språk ändrar utskriftsspråk och namnordning om förnamnet ska visas först eller sist i personnamn.
Typsnitt och listor innehåller ett antal knappar med vilka man kan ändra typsnitt för olika text-typer och två av knapparna ändrar utseende för listor. Det finns också en kryss-ruta som ska vara ikryssad om man vill att ändringar av en typsnittsfamilj ska slå igenom för alla text-typer.
Dokument
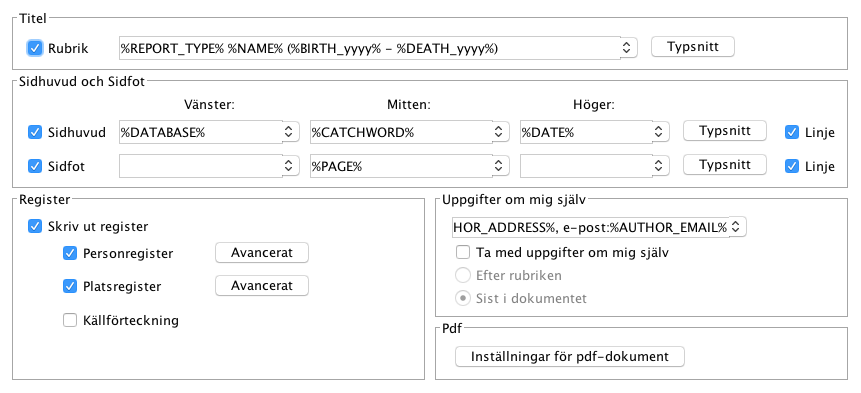
För rubrik, sidfot, sidhuvud och uppgifter om mig själv kan man skapa egna "formler" för vad som ska ingå på respektive plats. Formlerna skapas med en kombination av dynamiska värden som är de som står mellan procenttecken och som finns definierade i hjälpen i Genney.
För varje avsnitt finns ett flertal fördefinierade formler i listrutorna men man kan kombinera dessa dynamiska värden med egen text efter behov där texten mellan procenttecknen byts ut beroende på vem och vad som skrivs ut.
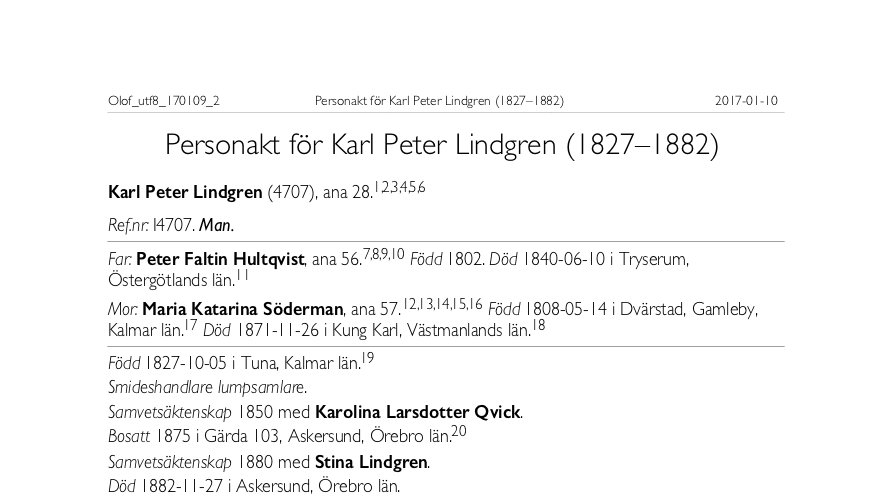
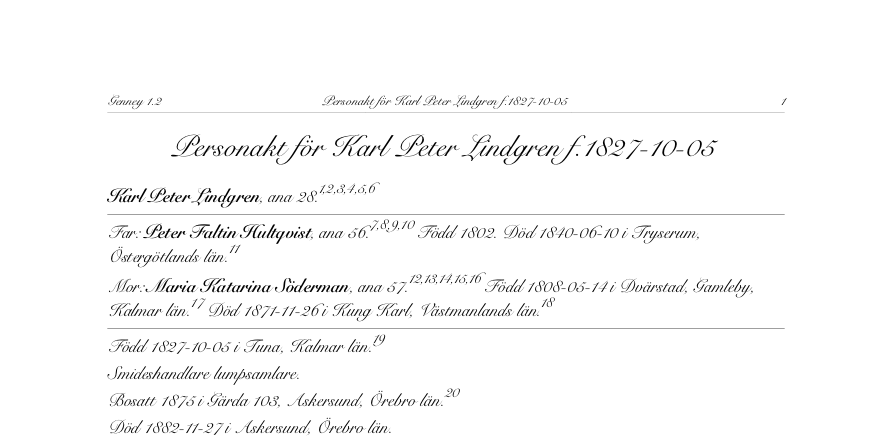
Formeln %REPORT_TYPE% för %NAME% f.%BIRTH_yyyy% skulle för en personakt resultera i:
Personakt för Anders Person f.1827
och formeln %REPORT_TYPE% %NAME% (%BIRTH_yyyy%–%DEATH_yyyy%) resulterar i:
Personakt Anders Person (1827–1899)
Under register anger du vilka register som ska ingå i rapporten och hur dom ska se ut och under pdf ändrar du inställningar för pdf-skrivaren som ingår i Genney.
Mall för innehåll
När man gjort ändringar i en mall som man vill använda och inte ändra på orginalmallen väljer man Spara som och kan sen lätt växla mellan de olika mallarna.
Det går här också att Importera och Exportera mallar.

Resultat av två olika utskriftsmallar.